
A proxy server functions as an intermediary between a user and the internet, allowing you to mask your real IP address and maintain anonymity while browsing online. Moreover, proxies can help improve page loading speeds, protect against malware, and serve other specialized purposes.
BlueStacks is a widely used Android emulator for PC that enables you to run mobile applications on your computer. To take full advantage of this software’s features, it’s crucial to properly configure a proxy server. This article provides a detailed, step-by-step guide to help you set it up.
How to Set Up a Proxy in BlueStacks: Detailed Instructions
To set up a proxy in BlueStacks, follow these steps:
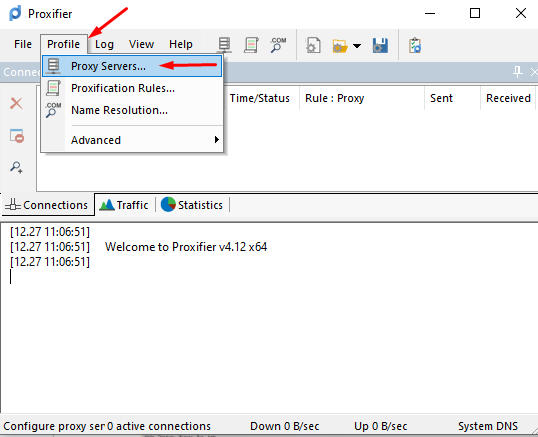
- Launch the Proxifier application.
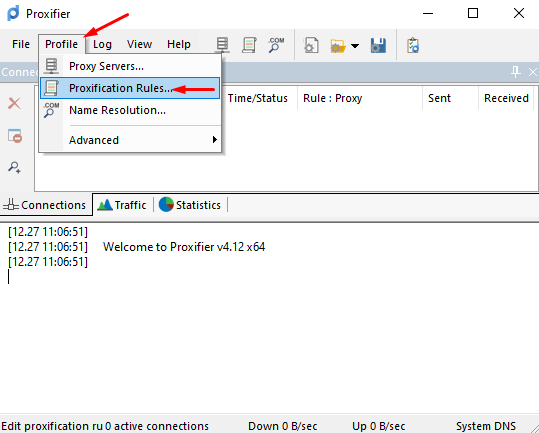
- In the main menu, locate and click on the “Profile” section.
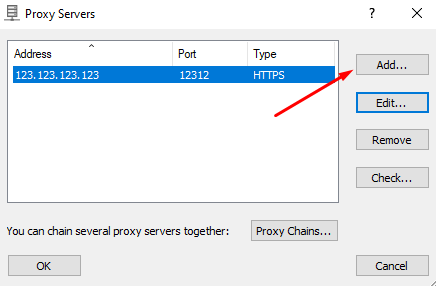
- Select “Proxy Servers” and proceed to add a new proxy server.
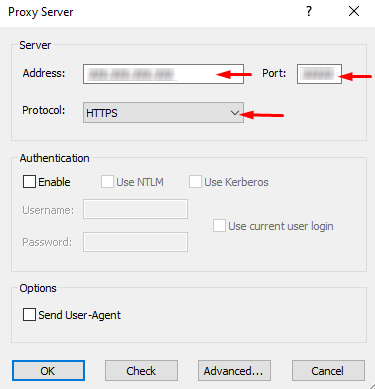
- Enter the IP address, port number, and protocol type of the proxy server.
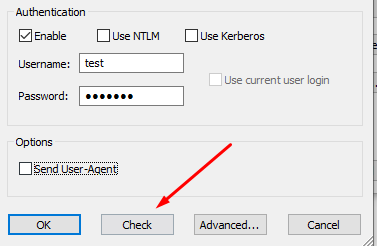
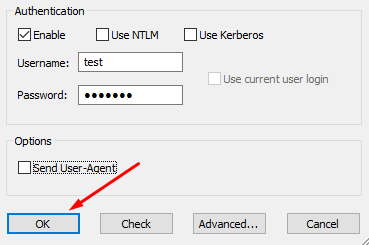
- If authentication is required, enable the relevant fields and input your username and password.
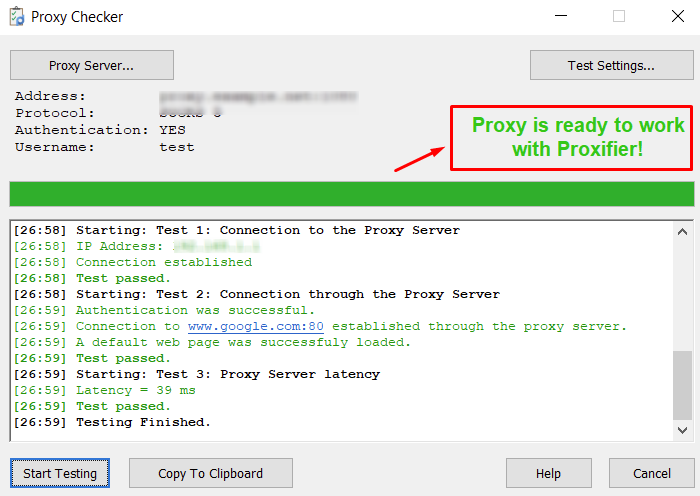
- Test the proxy connection by clicking on the “Check” button.
- When the test completes successfully and looks like this:
click “OK” and return to the main menu of the program.
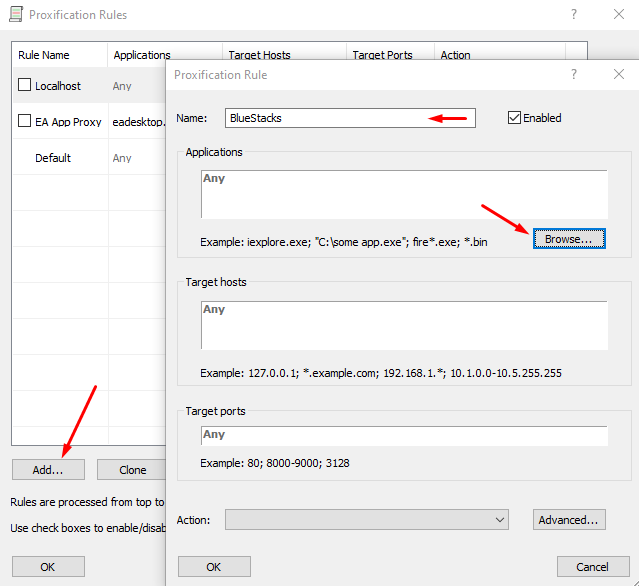
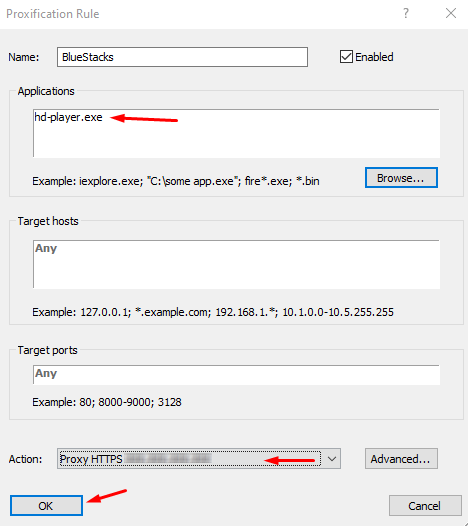
- Navigate to “Proxification Rules” and create a new rule to apply the proxy.
- Assign a name to your rule and select the BlueStacks executable (.exe file) in the corresponding window.
- From the “Action” dropdown, select the configured proxy server and confirm by clicking “OK” to save your settings.

After completing these steps, all network traffic from BlueStacks will be routed through the configured proxy via Proxifier.
How to Select a High-Quality Proxy
Choosing a reliable proxy server is essential for ensuring secure and efficient online operations. Follow these recommendations to pick the right provider:
- Define Your Purpose
Clarify your objectives for using a proxy. If privacy is your top priority, opt for a proxy that ensures anonymity.
- Evaluate the Provider
Research the provider’s reputation by reading user reviews and expert analyses. Confirm that they offer technical support in case you need assistance.
- Measure Connection Speed
Test the proxy’s speed before purchasing. This will help you avoid performance issues later on.
- Look for Extra Features
Some providers offer additional features such as malware protection or location selection, which can boost both security and usability.
- Compare Costs
While price matters, avoid sacrificing quality for savings. Poor-quality proxies often lead to slow speeds and compromised data security.
Where to Get Reliable Proxies?
Belurk offers high-speed, anonymous proxies with numerous advantages that appeal to users:
- High-Speed Connections
Belurk delivers fast connections for a superior browsing experience, reduced latency, and stable access to web resources. This is especially beneficial for tasks like SEO, automation, or data scraping.
- Support for Multiple Protocols
Belurk supports both HTTP and Socks5 protocols, providing flexibility for various applications and ensuring broad compatibility.
- Flexible Purchase Options
You can buy proxies starting from just one IP address — perfect for smaller projects. Flexible pricing plans allow you to select what best fits your specific requirements, combining convenience with affordability.
- Developer-Friendly API
Belurk offers an API for seamless integration of proxies into your software projects. This feature simplifies management and enhances usability for developers.
Combining BlueStacks with a proxy server delivers significant advantages, including heightened online privacy, improved speed, and broader accessibility. However, to achieve these benefits, proper configuration and selecting a reputable proxy provider are essential.
Leave a Reply